Hello everybody, hope you’re having an amazing day today. Today, we’re going to prepare a special dish, italian ciabatta bread (no knead). One of my favorites food recipes. For mine, I will make it a bit tasty. This will be really delicious.
Italian Ciabatta Bread (No Knead) is one of the most well liked of recent trending meals on earth. It’s enjoyed by millions every day. It is easy, it is fast, it tastes delicious. They’re nice and they look fantastic. Italian Ciabatta Bread (No Knead) is something that I’ve loved my whole life.
Easy Artisan Ciabatta Bread Recipe/Rustic Italian Bread/No Knead Rustic Bread. No Knead French Style Baguettes long proof better bread. Ciabatta dough is very wet and this no-knead technique is perfect for this type of dough. It's worth watching the video to see how the dough is shaped and For no work and only a few ingredients, this made good bread.
To begin with this recipe, we must first prepare a few components. You can cook italian ciabatta bread (no knead) using 5 ingredients and 16 steps. Here is how you can achieve it.
The ingredients needed to make Italian Ciabatta Bread (No Knead):
- Take 320 ml Water
- Prepare 1/2 tsp Instant Yeast
- Take 30 ml Olive Oil
- Make ready 1/2 tbsp Salt
- Make ready 3 Cups Bread flour
The no-knead part is just a bonus, and only adds to the perfection of this loaf. As you'll hear in the video, I'm a bit under the weather, but even. Authentic Italian ciabatta bread recipe or Slipper Bread originally from the Veneto made with an overnight starter & cooked on a pizza stone. Place the slices directly in the toaster when ready to eat, no need to thaw them.
Instructions to make Italian Ciabatta Bread (No Knead):
- In a big mixing bowl: Mix all the aforementioned ingredients- One by one.
- Firstly, the water & yeast- mix it well…then add in the olive oil & salt & give all a nice mix, altogether.
- Now, add in the Flour & mix it well with the gentle folding methods- (Don’t over-mix) & cover the bowl & keep it for its 1st proofing for 40 mins by the timer.
- After the first 40 mins open the lid- Gently again fold gently, the four sides, allowing air to percolate into the same (dip your fingers in water in a separate bowl) to avoid it sticking too much in the fingers while folding.
- Again, close the lid- set it aside for its 2nd proofing for the next 40 mins time.
- Again, the same procedures repeated (aforementioned): Set it aside for its 3rd proofing with its cover on.
- Time for the 4th proofing- Following the same methods- mentioned above. Set aside for the 40 mins time again.
- Now, open the lid- Sprinkle/Dust some flour all over it (dough) gently & on the workstation too- so as to avoid sticking to the same & place it on the workstation now.
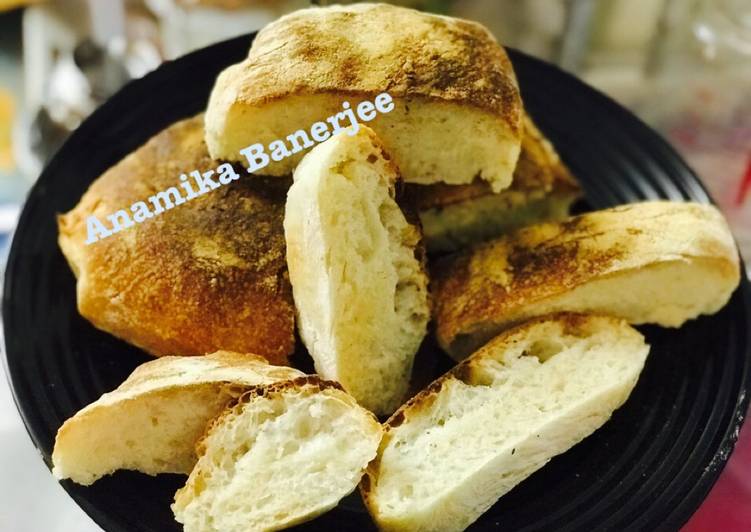
- Now, with a cake/dough divider- gently lift it up a bit, from all its 4 sides & then cut it into 4 equal halves with the same.
- In a baking tray: Line up with a parchment paper that’s slightly bigger than the size of the baking tray.
- Now, gently & carefully lift up the 4 dough-lets with the help of the divider/tool in hands & place it very cautiously into the tray- by keeping sufficient places in between each other & also the extra size of the lining paper should now be folded in between each one of them to avoid any contact with them from any sides.
- Now, time for its final proofing for the last 40 mins time in the same way. Placed in the tray & covering the tray with a cloth.
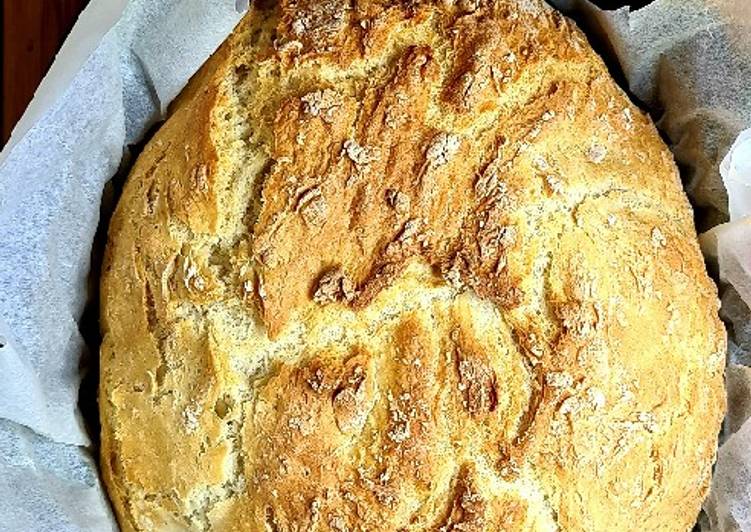
- Bake it now, in a preheated oven at 220C, for about 20-25 mins time or until it turns dark golden brown from all its sides.
- Take it out from the oven- Allow it to cool down just a bit & then, Transfer it to the serving tray/plate…& serve it hot/warm as you prefer. Just freshly baked from the HOME-BAKERY.
- Note– Bread Flour (Homemade): If you don’t know what bread flour is or how to prepare that at home- you can substitute the same by normal AP Flour too but the texture definitely varies quite a bit.
Authentic Italian ciabatta bread recipe or Slipper Bread originally from the Veneto made with an overnight starter & cooked on a pizza stone. Place the slices directly in the toaster when ready to eat, no need to thaw them. This Italian Ciabatta Bread recipe will transform your kitchen into an Italian bakery. Follow our easy to make recipe for a fragrant Italian Ciabatta bread. A classic Italian bread, ciabatta has a rustic appearance and an elegant flavor.
So that is going to wrap this up for this special food italian ciabatta bread (no knead) recipe. Thank you very much for your time. I am sure you will make this at home. There’s gonna be more interesting food at home recipes coming up. Remember to bookmark this page on your browser, and share it to your loved ones, friends and colleague. Thank you for reading. Go on get cooking!